
Introduction to YOLO
YOLO (You Only Look Once) is a state-of-the-art object detection framework designed for speed and accuracy. Unlike traditional methods, YOLO processes an image in a single forward pass, making it highly efficient for real-time applications such as autonomous vehicles, surveillance, and augmented reality.
Benefits of YOLO:
- Real-Time Performance: Processes images at high FPS (frames per second).
- End-to-End Solution: Detection and classification in one step.
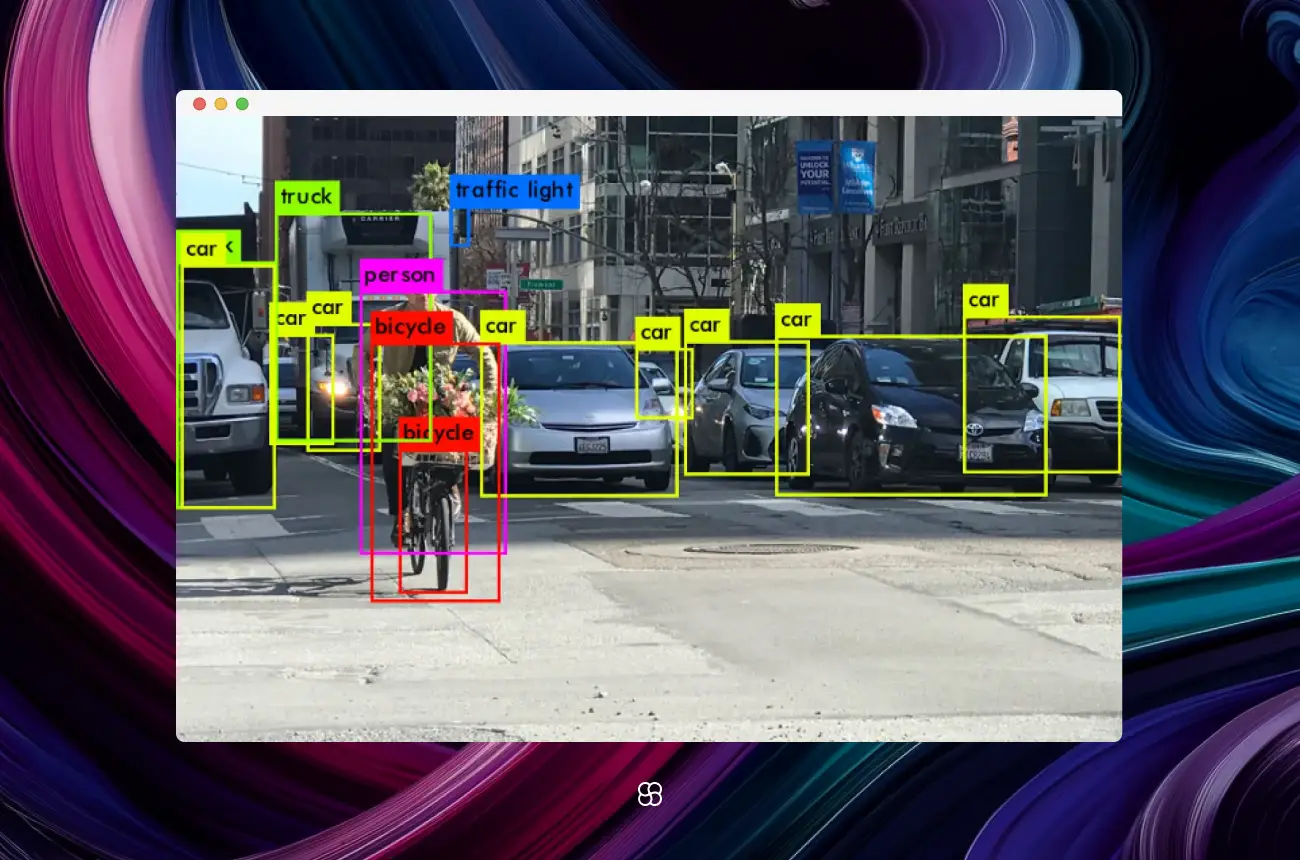
- Versatility: Works with different image resolutions and can detect multiple objects in one frame.
- Pre-Trained Models: Leverage pre-trained weights (e.g., COCO dataset) for quick deployment.
- Scalable: Works on a variety of devices, from edge devices to cloud infrastructures.
- Customizability: Allows training on custom datasets for specific applications.
Applications of YOLO
YOLO has a wide range of applications across industries, including:
- Autonomous Vehicles: Detect pedestrians, other vehicles, and road signs for navigation.
- Surveillance: Identify and track intruders or suspicious activity in real-time.
- Healthcare: Detect anomalies in medical imaging such as X-rays or MRIs.
- Retail: Monitor shelf stock and analyze customer behavior.
- Agriculture: Detect pests, monitor crops, and assess yield.
- Wildlife Monitoring: Identify and track animals in their natural habitats.
- Augmented Reality: Integrate object detection for interactive AR experiences.
- Robotics: Enable robots to perceive their environment and interact with objects.
Getting Started
1. Installation and Setup
To get started with YOLO, we recommend using the Ultralytics implementation, which simplifies the process:
Prerequisites:
- Python (>=3.7)
- GPU with CUDA (for better performance, optional)
- pip
Steps:
# Clone the YOLO repository
!git clone https://github.com/ultralytics/yolov5.git

# Navigate to the directory
cd yolov5

# Install dependencies
!pip install -U pip setuptools wheel
!pip install -r requirements.txt
2. First Steps
Download a Pre-Trained Model:
YOLO provides pre-trained weights. Choose a model based on your performance needs (e.g., yolov5s for speed, yolov5x for accuracy):
# Example to download yolov5s
!python detect.py --weights yolov5s.pt --source data/images --img-size 640 --conf-thres 0.25
Directory Structure Overview:
data/: Dataset and image storagemodels/: YOLO model architectureweights/: Pre-trained model weightsdetect.py: Script for running object detection
Step-by-Step Example: Building a Simple Object Detection Agent
1. Setting Up a Custom Dataset
a) Organize Data:
- Create a folder named
custom_dataset. - Inside, create
images/andlabels/folders. - Save images in
images/and their corresponding label files (in YOLO format) inlabels/.
b) Format Data:
The YOLO label format requires a .txt file for each image:
<class_id> <x_center> <y_center> <width> <height>- Values are normalized (0 to 1).
- Example for a single object:
0 0.5 0.5 0.2 0.3c) Create a YAML File:
train: custom_dataset/images/train
val: custom_dataset/images/val

nc: 1  # Number of classes
names: ['object']  # Class names
Save this as data.yaml.
2. Training the Model
a) Modify train.py:
python train.py --img 640 --batch 16 --epochs 50 --data data.yaml --weights yolov5s.pt--img: Image size--batch: Batch size--epochs: Number of training iterations--data: Path to the YAML file--weights: Pre-trained weights
3. Running Object Detection
a) Test the Model:
Run inference on a test image:
python detect.py --weights runs/train/exp/weights/best.pt --source data/images/testb) Visualize Results:
Output images and videos will be saved in runs/detect/.
4. Advanced Usage
a) Deploying the Model:
Convert the trained YOLO model to other formats for deployment:
# Export to ONNX format
python export.py --weights runs/train/exp/weights/best.pt --include onnx

# Export to TensorRT
python export.py --weights runs/train/exp/weights/best.pt --include engine
b) Real-Time Streaming:
Use a webcam or video stream as input:
python detect.py --weights runs/train/exp/weights/best.pt --source 0 # Webcamc) Integration with Other Frameworks:
Integrate YOLO with applications using REST APIs or libraries like Flask, FastAPI, or Django.
Full Python Example:
from yolov5 import YOLOv5

# Load the YOLOv5 model
model = YOLOv5('yolov5s.pt')

# Run inference
results = model.predict('data/images/test.jpg', size=640)

# Display results
results.show()

# Save annotated image
results.save('output/')

# Access detected objects
for obj in results.xyxy[0]:
    print(f"Detected {obj[-1]} at {obj[:4]} with confidence {obj[4]:.2f}")
Final Thoughts
YOLO simplifies real-time object detection with its speed and accuracy. By following this guide, you can set up YOLO, train it on custom datasets, and perform inference in real-time. Advanced techniques like exporting models for deployment or integrating with IoT devices can take your projects further. With its versatility and efficiency, YOLO empowers developers to build innovative solutions across industries.
For further exploration, experiment with:
- Data Augmentation: Enhance training data with transformations.
- Custom Architectures: Tailor YOLO layers for unique use cases.
- Post-Processing: Filter detections for specific conditions.
- Edge Deployment: Optimize YOLO for lightweight devices like Raspberry Pi or NVIDIA Jetson.
You can also find more information and examples here.
Tega AdeyemiJanuary 29, 2025