
1. Introduction and Framework Presentation
OpenAI’s Responses API is a new API primitive that extends the capabilities of the Chat Completions API by incorporating built-in tools such as web search, file search, computer use, and code interpretation. Essentially, it provides developers with atomic building blocks that can be orchestrated to create complex agents capable of handling multifaceted tasks. These agents can retrieve real-time information, search through documents, perform computer operations, or even execute code to solve complex problems.
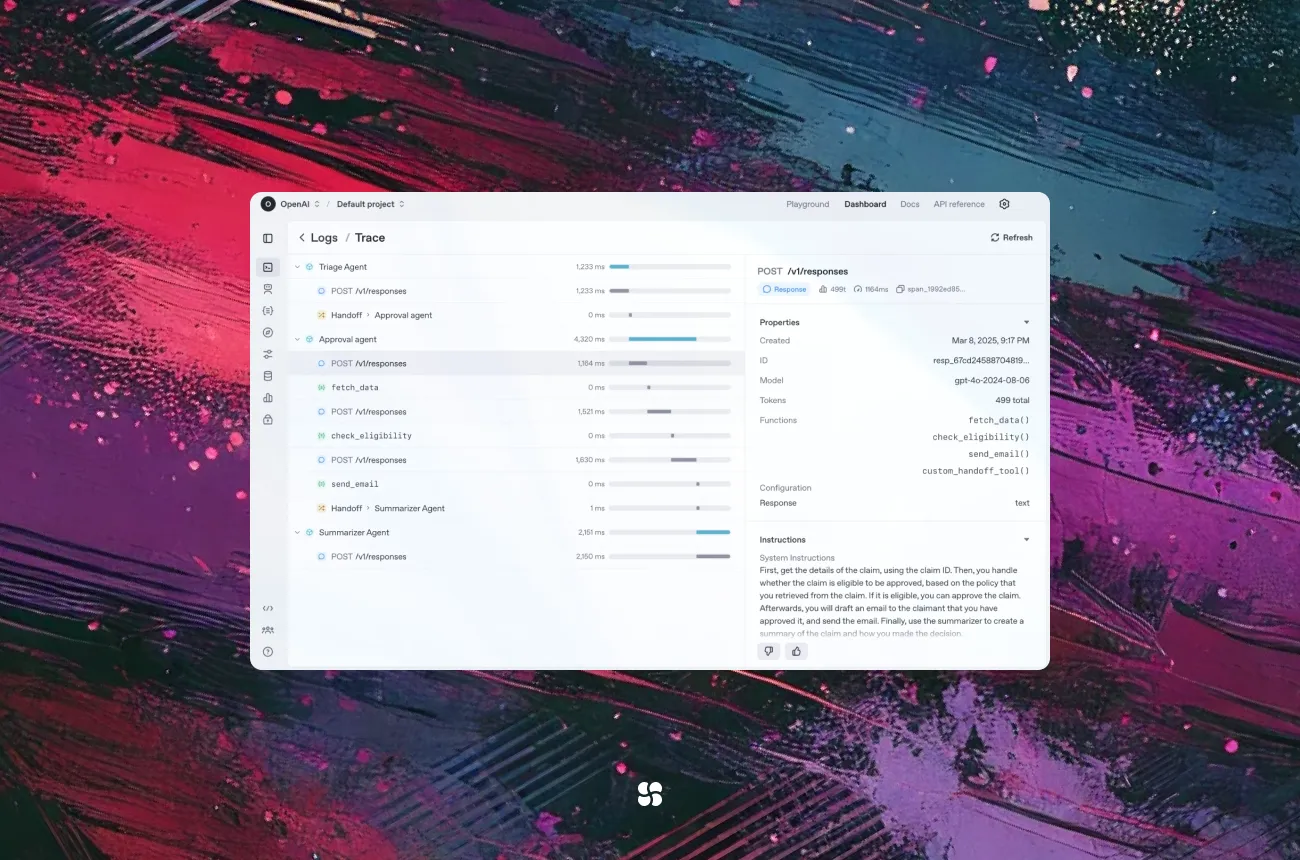
The API sits at the heart of OpenAI’s evolving developer ecosystem and is complemented by the Agents SDK—a framework for coordinating multiple agents working in tandem toward a unified goal. This design makes the Responses API not only easy to integrate into your applications but also scalable and robust for enterprise-grade projects.
For more detailed reference information, check out the official Responses API documentation.
2. Benefits of Using the Responses API
Using the Responses API comes with several compelling advantages:
- Simplicity and Integration:
The API builds on the familiar Chat Completions API structure, meaning developers can get started quickly without needing to learn entirely new paradigms. - Powerful Built-in Tools:
With capabilities like real-time web search, document search, computer use, and code interpretation, developers can build agents that extend far beyond basic conversational interfaces. These tools help agents perform dynamic actions based on current data and complex logic. - Scalability and Flexibility:
Whether you’re building a small prototype or an enterprise-level solution, the API supports scaling. Its design accommodates integration with multiple models (such as GPT-4o and GPT-4o mini) and supports advanced use cases like orchestration via the Agents SDK. - Enhanced Developer Productivity:
The unified structure and robust tooling reduce development time. Developers can focus on crafting unique agent behaviors instead of handling low-level integration details. - Enterprise-Grade Security:
OpenAI’s platform is designed with security and compliance in mind. Features such as encryption, data retention policies, and granular access controls ensure that your applications meet modern security standards.
3. Getting Started
3.1. Installation and Setup
Before you begin, you need to sign up for an account at platform.openai.com and obtain an API key. Once you have your API key, install the required tools—most commonly, you will use HTTP libraries available in your programming language of choice (such as requests for Python or fetch in JavaScript).
3.2. Environment Setup
For Python users, ensure you have Python 3.7+ installed and install the requests package:
pip install requests3.3. Your First API Call
Below is a simple Python code snippet demonstrating how to call the Responses API:
import requests
import json

# Replace with your actual OpenAI API key
API_KEY = "your-api-key-here"
url = "https://api.openai.com/v1/responses"

headers = {
    "Authorization": f"Bearer {API_KEY}",
    "Content-Type": "application/json"
}

data = {
    "model": "gpt-4o",  # or any other supported model
    "prompt": "Tell me a fun fact about space.",
    "tools": ["web_search"],  # Specify any built-in tools if required
    "parameters": {
        "query": "latest discoveries in space"
    }
}

response = requests.post(url, headers=headers, data=json.dumps(data))
print(response.json())
In this snippet:
- We set up the API endpoint and headers.
- The
datapayload includes the model selection, prompt, and optional tool parameters (likeweb_search) to augment responses. - Finally, we send a POST request and print the API’s response.
4. Step-by-Step Example: Building a Simple Agent
Let’s build a simple agent that uses the Responses API to both answer a query and perform a web search for current information.
Step 1: Define the Task
Our agent will:
- Receive a user query about the weather.
- Use the web search tool to fetch real-time weather information.
- Combine this with its conversational ability to produce a final answer.
Step 2: Set Up Your Environment
Make sure you have your API key and the requests library installed as described above.
Step 3: Write the Agent Code
Below is an example in Python:
import requests
import json

API_KEY = "your-api-key-here"
url = "https://api.openai.com/v1/responses"

headers = {
    "Authorization": f"Bearer {API_KEY}",
    "Content-Type": "application/json"
}

# Function to build and run our agent
def run_weather_agent(user_query):
    # Construct the API request payload
    payload = {
        "model": "gpt-4o",
        "prompt": f"User query: {user_query}\nAction: Provide current weather details using a web search.",
        "tools": ["web_search"],
        "parameters": {
            "query": "current weather in Paris"
        }
    }

    response = requests.post(url, headers=headers, data=json.dumps(payload))
    if response.status_code == 200:
        result = response.json()
        print("Agent Response:")
        print(json.dumps(result, indent=2))
    else:
        print("Error:", response.status_code, response.text)

# Example usage:
if __name__ == "__main__":
    user_input = "What's the weather like in Paris today?"
    run_weather_agent(user_input)
Step 4: Run and Test Your Agent
- Save the code to a file (e.g.,
weather_agent.py). - Run the script from your terminal:
python weather_agent.py- Inspect the printed output. The agent should combine its response with real-time weather details obtained via the web search tool.
Step 5: Expand and Customize
From here, you can modify the agent to handle additional tasks, integrate more tools (like file search or code interpreter), or add error handling and logging to suit your application’s needs.
5. Final Thoughts
The OpenAI Responses API represents a significant step forward in making AI agents more powerful, dynamic, and easier to build. With its built-in tools and the flexibility of the Agents SDK, developers can craft solutions that not only respond to user queries but also interact with external data sources and perform complex tasks autonomously.
As the API continues to evolve (with plans to phase out legacy tools like the Assistants API by mid-2026), keeping an eye on the latest updates and best practices is crucial. Experiment with different models, integrate additional tools, and build robust, secure applications that leverage the full power of OpenAI’s platform.
For more detailed documentation and updates, refer to the official Responses API documentation and explore the OpenAI API Platform.
Happy coding!
Tega AdeyemiApril 7, 2025